Introduction
UPDATED FOR UNRAID 6.4
Here you will find a guide on installing letsencrypt and duckdns docker containers on UnRAID. You will be guided on creating a account with the dynamic dns service known as duckdns aswell as shown how to use letsencrypt and reverse proxy your internal applications such as plex, deluge, sonarr, couchpotato etc. they will even be accesible via HTTPS securely.
Goals
- To be able to access UnRAID dockers such as sonarr, radarr, couchpotato, htpc-manager from outside of your LAN in a secure way via HTTPS.
- To make the more complicated Nextcloud work via reverse proxy.
- Enable automatic IP address updating to your chosen DuckDNS domain.
Setting up the DuckDNS docker container
The first thing we need to do is install the DuckDNS docker from Community Applications
- From the UnRAID webui click “Apps” then in the search box type “DuckDNS” and press enter.
- Click “Add” under the duckdns docker made by linuxserver.
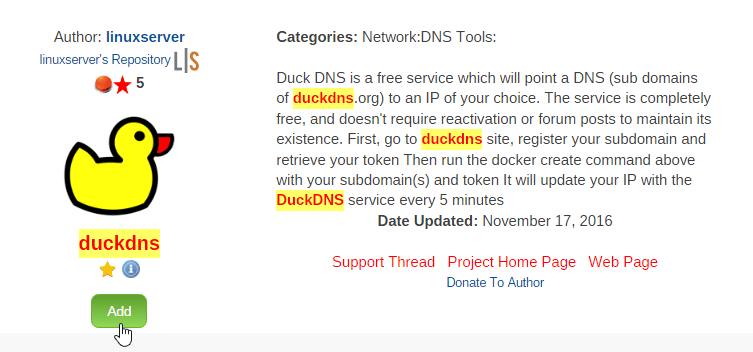
- Now we need to visit the duckdns website (use a new tab/window).
- Log in to the website using any of the available options (Twitter, Reddit, Google etc.).
- Type in your desired sub domain and press add domain, for this tutorial i have my subdomain as cyanlabstutorial.
- Now copy the “Token” as we will need this shortly.
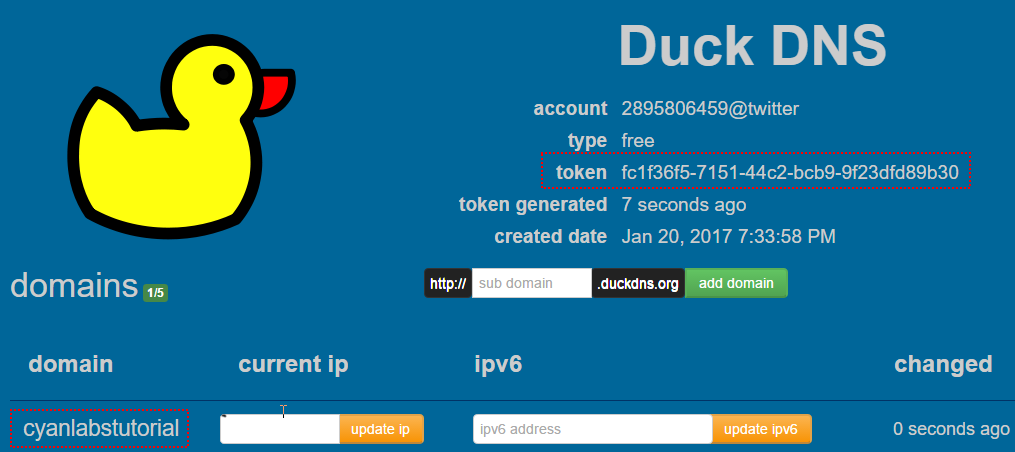
- Now back on the UnRAID page where we added the duckdns docker enter the relevant information, for this tutorial i set subdomains to “cyanlabstutorial” and token to the value copied earlier.
- We are now done with the duckdns configuration, make sure the docker is running and then move on to the next section.
Setting up the Letsencrypt docker container.
Now that we have DuckDNS installed we need to go back to Community Applications to install letsencrypt.
- From the UnRAID webui click “Apps” then in the search box type “letsencrypt” and press enter.
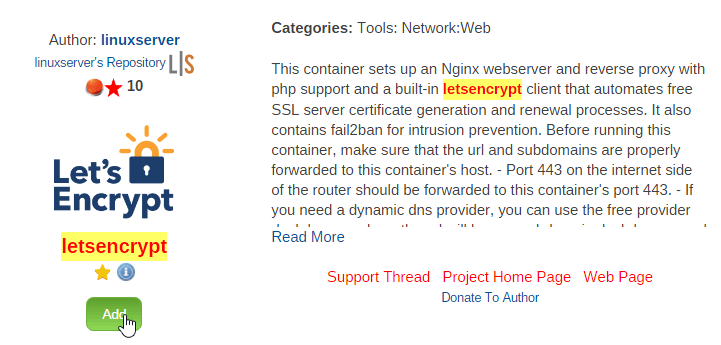
- Click “Add” under the letsencrypt docker made by linuxserver.
- Next we need to configure the docker correctly, by default UnRAID runs on port 80 so set the “http” field to 81, the “https” field to 444 and in the “email” field enter your email address, in the “domain name” field enter “duckdns.org” and for the “subdomains” enter your domain from earlier which for me is “cyanlabstutorial”, finally set the “only subdomains” field to true and press “Apply”.
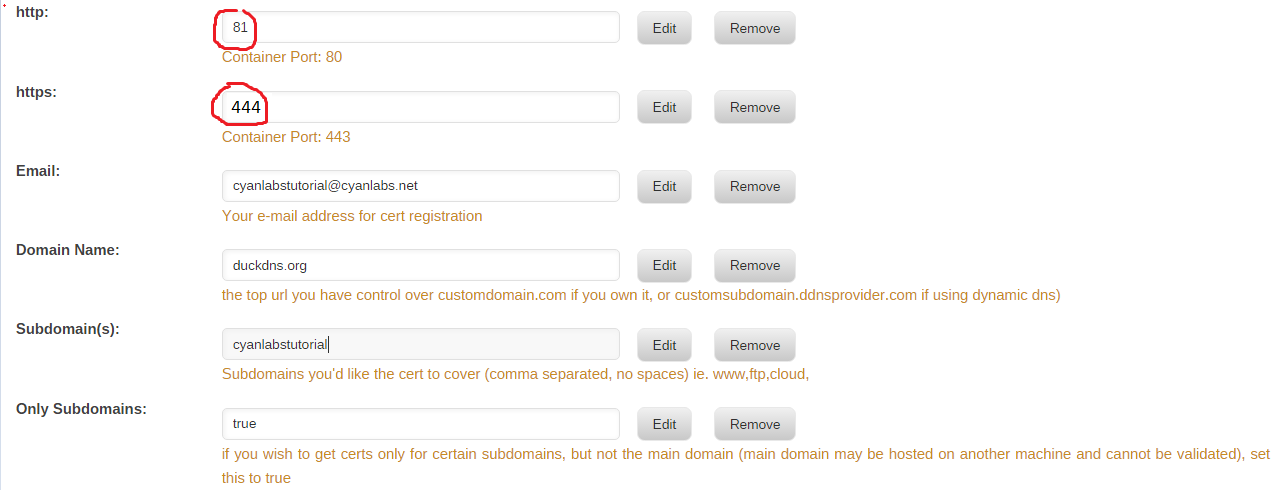
- Since we have set the internal docker port to be 81 you can currently visit the nginx default webpage by going to your UnRAID ip at port 81. For me it would be this http://192.168.1.3:81 or https://192.168.1.3. We now need to forward ports in your router, i’m not going to go over this as its different for each router but basically you need to forward external port 80 and 443 to internal port 81 and 444 to your UnRAID IP which for me is 192.168.1.3.

- We are now done with the docker configuration for letsencrypt, start the docker and shortly after you should see something like this in the log.
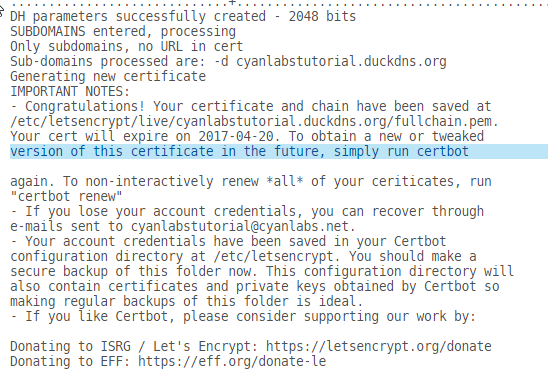
- We can now move on with the next section of the tutorial.
Configuring Nginx as a reverse proxy.
Now that we have both DuckDNS and Letsencrypt set up it’s time to configure Nginx as a reverse proxy.
- The first thing we need to do is access your appdata folder on windows, for me this is 192.168.1.3appdata.
- Once in your appdata folder go to the folder called letsencrypt then nginx then site-conf (so for me this is 192.168.1.3appdataletsencrypt-nginxsite-confs).
- This docker is pretty good for getting the configuration right automatically, however i have configured it to work with sonarr, radarr, htpc, deluge, plex, nextcloud and even netdata. the file can be downloaded from here. (i plan on explaining this file further in the future)
- Now simple delete the existing default file and replace it with the one linked above, make sure to rename it to default if it’s called default.txt. you may also need to run newperms to allow you to replace it.
- Next open the file in notepad++ or similar and change any references to 192.168.1.3 to your UnRAID server IP and also make sure the port numbers match your services.
- You also need to set the settings for these services, the webdir, webroot or base directory need to be set to the relevant paths.
- HTPC-Manager is /htpc and the port is 8085
- Sonarr is /sonarr and the port is 8989
- Couchpotato is /couchpotato and the port is 5050
- Radarr is /radarr and the port is 7878
- Deluge is /downloads (could be changed to deluge if preferred) and the port is 8112
- Plex requires the advanced setting “Server > Network >Custom server access URLs” to include “https://YOURSUBDOMAIN.duckdns.org”.
- Nextcloud is /nextcloud, the port is 444 and requires manual modification (see section below)
- Netdata is /netdata and the port is 19999 (slightly different syntax in the nginx config file)
- Once this is done you can restart the dockers for these services and you should be able to access your services from https://YOURSUBDOMAIN.duckdns.org/service, if you need help with additional services or having any issues at all let me know in the comments below.
Fixing Nextcloud so that it works via the reverse proxy.
Hopefully now you have all your services working remotely via “https://YOURSUBDOMAIN.duckdns.org” with the exception of nextcloud, lets fix this.
- Firstly we need to go to the following folder UnRAIDIPappdatanextcloudnginxsite-confs
- Open the default file with notepad++ or similar.
- Replace the following lines.
# Path to the root of your installation
root /config/www/nextcloud/;
With this# Path to the root of your installation
root /config/www; - Next go to UnRAIDIPappdatanextcloudconfigwwwnextcloudconfig
- Open the config.php file with notepad++ or similar.
- Replace the following lines, add them if not already there.
‘trusted_domains’ =>
array (
0 => ‘UNRAIDIP’,
1 => ‘www.SUBDOMAIN.duckdns.org’,
2 => ‘SUBDOMAIN.duckdns.org’,
),
‘trusted_proxies’ => [‘UNRAIDIP’],
‘overwritewebroot’ => ‘/nextcloud’,
‘overwrite.cli.url’ => ‘/nextcloud’, - Make sure to replace UNRAIDIP and SUBDOMAIN with your details. Restart the Nextcloud docker and if everything went well you should be able to access it at https://YOURSUBDOMAIN.duckdns.org/nextcloud .
Services (proxy_pass)
Replace [IP] and/or [PORT] with your IP and port
Organizr
location / {
include /config/nginx/proxy.conf;
proxy_pass http://[IP]:[PORT]/;
}
HTPC Manager
location /htpc {
include /config/nginx/proxy.conf;
proxy_pass http://[IP]:8085/htpc;
}
Zoneminder
location /zm {
include /config/nginx/proxy.conf;
proxy_pass http://[IP]:[PORT]/zm/;
}
Sonarr
Base path = /sonarr
location /sonarr {
include /config/nginx/proxy.conf;
proxy_pass http://[IP]:8989/sonarr;
}
Radarr
Base path = /radarr
location /radarr {
include /config/nginx/proxy.conf;
proxy_pass http://[IP]:7878/radarr;
}
Headphones
Base path = /headphones
location /headphones {
include /config/nginx/proxy.conf;
proxy_pass http://[IP]:8181/headphones;
}
Deluge
location /downloads {
include /config/nginx/proxy.conf;
proxy_pass http://[IP]:8112/;
proxy_set_header X-Deluge-Base "/downloads/";
}
Plex Media Server
#PLEX
location /web {
# serve the CSS code
proxy_pass http://[IP]:32400;
}

# Main /plex rewrite
location /plex {
# proxy request to plex server
proxy_pass http://[IP]:32400/web;
}
Nextcloud
location /nextcloud {
include /config/nginx/proxy.conf;
proxy_pass https://[IP]:[PORT]/nextcloud;
}
Netdata
location ~ /netdata/(?<ndpath>.*) {
proxy_set_header X-Forwarded-Host $host;
proxy_set_header X-Forwarded-Server $host;
proxy_set_header X-Forwarded-For $proxy_add_x_forwarded_for;
proxy_pass http://backend/$ndpath$is_args$args;
proxy_http_version 1.1;
proxy_pass_request_headers on;
proxy_set_header Connection "keep-alive";
proxy_store off;
}
put this at the top of your default file
upstream backend {
server [IP]:19999;
keepalive 64;
}
Any issues please leave a comment below and I will do my best to get your issue solved.
If stuff isn’t working as expected, try clearing your web browsers cache.
