Summary
Here is a guide to show you how to go from the Hetzner Rescue System to Proxmox with a subnet for your VM’s with automatic DHCP all without needing additional IP addresses or additional “router” virtual machines. We will even explain how your can portforward some ports to specific VM’s if required.
Preparing the server
Once you have access to your Hetzner server, you need to activate the rescue system, to do this visit https://robot.hetzner.com/server and then select your server.
Select Rescue and press activate (leave the default set), you will now be told your root password, note this down.
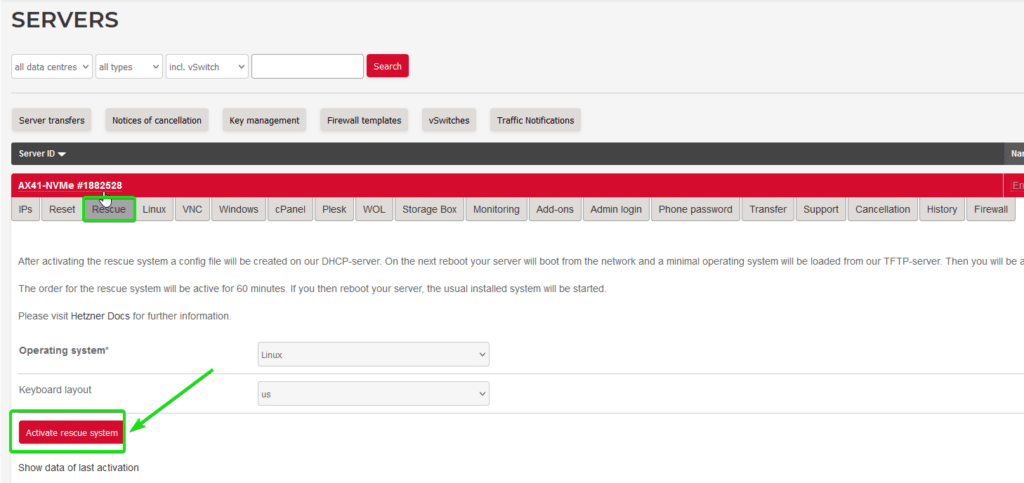
The server won’t yet be in Rescue mode, you will need to Reset the server, to do this select Reset and then Execute an automatic hardware reset .

The server will now boot in to Hetzner’s rescue system.
Installing Proxmox
Now that the server is in the rescue system we need to SSH in to the server using the IP of the server and root password you saved earlier, use SSH or PuTTY or Tabby or any other SSH client to access the server via SSH.
ssh root@<SERVER_IP>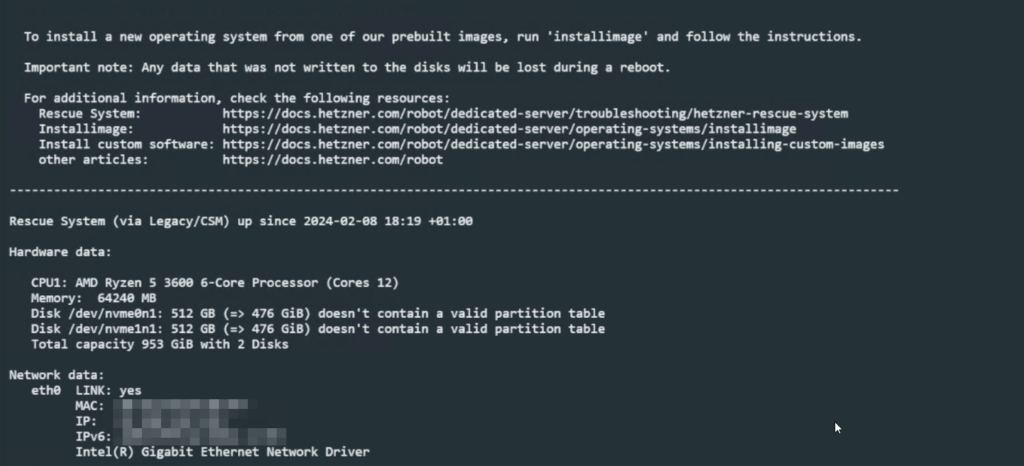
Downloading Proxmox VE
In the Rescue System enter the following commands to retrieve the latest Proxmox VE ISO
ISO_VERSION=$(curl -s 'http://download.proxmox.com/iso/' | grep -oP 'proxmox-ve_(\d+.\d+-\d).iso' | sort -V | tail -n1)
ISO_URL="http://download.proxmox.com/iso/$ISO_VERSION"
curl $ISO_URL -o /tmp/proxmox-ve.iso
Acquire Network Configuration
Enter the following commands to save variables containing the network interface name, IP address, CIDR and gateway
INTERFACE_NAME=$(udevadm info -q property /sys/class/net/eth0 | grep "ID_NET_NAME_PATH=" | cut -d'=' -f2)
IP_CIDR=$(ip addr show eth0 | grep "inet\b" | awk '{print $2}')
GATEWAY=$(ip route | grep default | awk '{print $3}')
IP_ADDRESS=$(echo "$IP_CIDR" | cut -d'/' -f1)
CIDR=$(echo "$IP_CIDR" | cut -d'/' -f2)
Initiate QEMU and start the Proxmox installation
Now we will use QEMU to create a virtual machine to allow us to install Proxmox from the downloaded ISO
For most systems Proxmox should be installed in UEFI mode, to do this use the following command, you may be able to verify this with efibootmgr
I’m not sure if this is usable in the Hetzner Recovery Enviroment as this information was added at a later date where i do not have access to a test system.
UEFI
sudo apt-get install -y ovmf
# Get the primary and secondary disks
PRIMARY_DISK=$(lsblk -dn -o NAME,SIZE,TYPE -e 1,7,11,14,15 | sed -n 1p | awk '{print $1}')
SECONDARY_DISK=$(lsblk -dn -o NAME,SIZE,TYPE -e 1,7,11,14,15 | sed -n 2p | awk '{print $1}')
# Kick off QEMU with CDROM
qemu-system-x86_64 -daemonize -enable-kvm -m 10240 -k en-us \
-drive file=/dev/$PRIMARY_DISK,format=raw,media=disk,if=virtio,id=$PRIMARY_DISK \
-drive file=/dev/$SECONDARY_DISK,format=raw,media=disk,if=virtio,id=$SECONDARY_DISK \
-drive file=/usr/share/OVMF/OVMF_CODE.fd,if=pflash,format=raw,readonly=on \
-drive file=/usr/share/OVMF/OVMF_VARS.fd,if=pflash,format=raw \
-cdrom /tmp/proxmox-ve.iso -boot d \
-vnc :0,password=on -monitor telnet:127.0.0.1:4444,server,nowait
If your system is old you may need to install using Legacy mode instead using the command below
Legacy
# Get the primary and secondary disks
PRIMARY_DISK=$(lsblk -dn -o NAME,SIZE,TYPE -e 1,7,11,14,15 | sed -n 1p | awk '{print $1}')
SECONDARY_DISK=$(lsblk -dn -o NAME,SIZE,TYPE -e 1,7,11,14,15 | sed -n 2p | awk '{print $1}')
# Kick off QEMU with CDROM
qemu-system-x86_64 -daemonize -enable-kvm -m 10240 -k en-us \
-hda /dev/$PRIMARY_DISK \
-hdb /dev/$SECONDARY_DISK \
-cdrom /tmp/proxmox-ve.iso -boot d -vnc :0,password -monitor telnet:127.0.0.1:4444,server,nowait
Both (UEFI & Legacy)
Now set a password for VNC with the following command, replace <VNC_PASSWORD> with your desired password
# Set VNC password
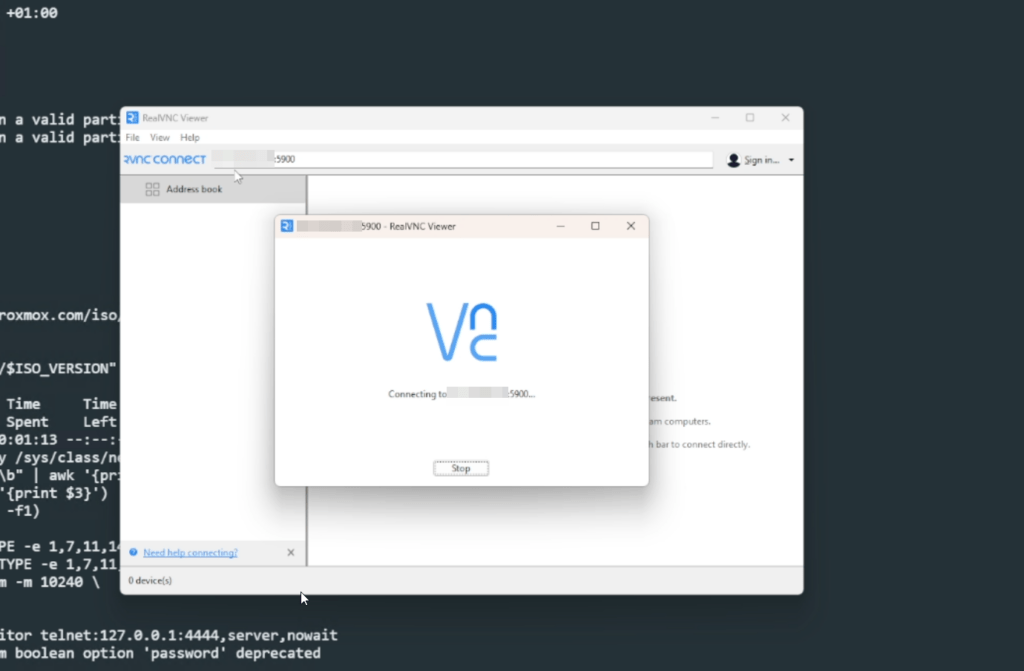
echo "change vnc password <VNC_PASSWORD>" | nc -q 1 127.0.0.1 4444Connect your VNC Viewer (RealVNC for example) to your <SERVER_IP>:5900 and enter the password you set in the previous step
Installing Proxmox via the GUI
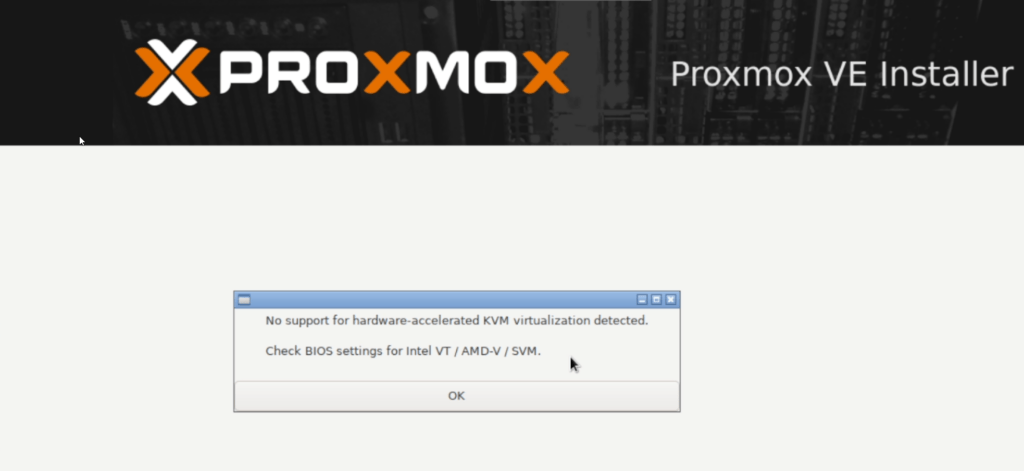
Once connected select Install Proxmox VE (Graphical), you will see a message saying “No support for hardware-accelerated KVM virtualization detected” this is safe to ignore as it’s because we are running it via QEMU at this time. Click OK to continue.
Agree to the license terms
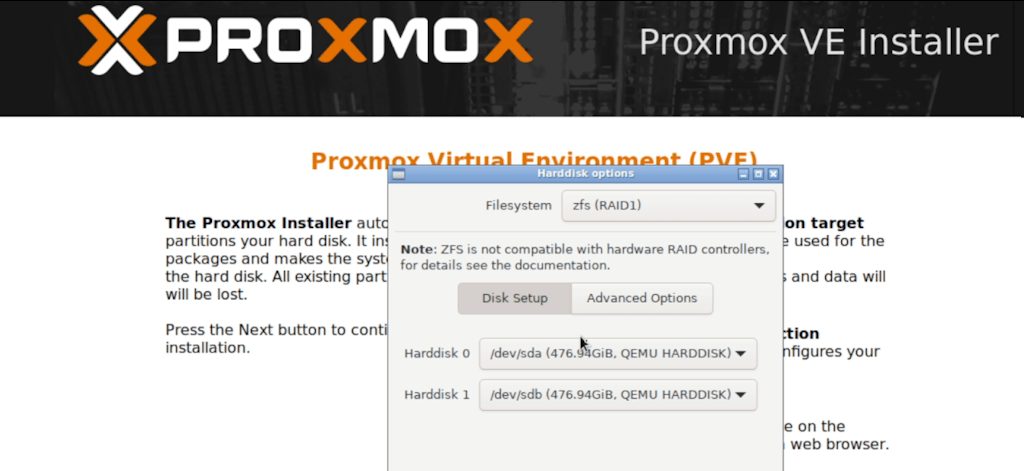
For the example i configured the disks to use ZFS (RAID1) but this is entirely up to you based on your needs.
Enter your Country, Time zone and Keyboard Layout
Enter your desired root password and email address. We would recommend using a simple password for now, some symbols may break the bash commands below
Leave the network settings as default
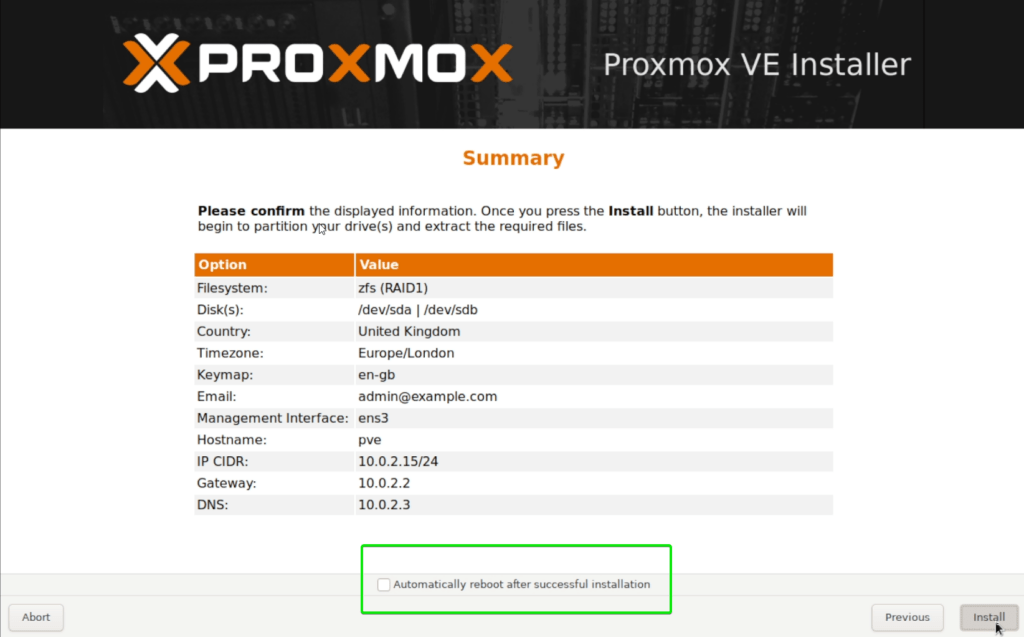
Untick “Automatically reboot after successful installation” and press Install
Once installation is complete, do not press Reboot, instead go back to the SSH terminal and enter the following command to close QEMU
# Stop QEMU
printf "quit\n" | nc 127.0.0.1 4444
Now we need to configure QEMU again but this time to boot from the internal drive and not from our Proxmox ISO
Again depending on if your system is UEFI or Legacy we need to run one of the following commands
UEFI
# Kick off QEMU without CDROM
qemu-system-x86_64 -daemonize -enable-kvm -m 10240 -k en-us \
-drive file=/dev/$PRIMARY_DISK,format=raw,media=disk,if=virtio,id=$PRIMARY_DISK \
-drive file=/dev/$SECONDARY_DISK,format=raw,media=disk,if=virtio,id=$SECONDARY_DISK \
-drive file=/usr/share/OVMF/OVMF_CODE.fd,if=pflash,format=raw,readonly=on \
-drive file=/usr/share/OVMF/OVMF_VARS.fd,if=pflash,format=raw \
-vnc :0,password=on -monitor telnet:127.0.0.1:4444,server,nowait \
-net user,hostfwd=tcp::2222-:22 -net nic
Legacy
# Kick off QEMU without CDROM
qemu-system-x86_64 -daemonize -enable-kvm -m 10240 -k en-us \
-hda /dev/$PRIMARY_DISK \
-hdb /dev/$SECONDARY_DISK \
-vnc :0,password -monitor telnet:127.0.0.1:4444,server,nowait \
-net user,hostfwd=tcp::2222-:22 -net nic
Both (UEFI & Legacy)
Now set a password for VNC again with the following command, replace <VNC_PASSWORD> with your desired password
# Set VNC password
echo "change vnc password <VNC_PASSWORD>" | nc -q 1 127.0.0.1 4444
Connect back to the server with your VNC Client, <SERVER_IP>:5900 and wait for the system to boot.
Once Proxmox has booted return to the SSH client and install sshpass
apt-get -y install sshpassNext we need to configure the network interfaces to work correctly once you reboot to baremetal Proxmox.
Enter the following commands replacing <ROOT_PASSWORD> with the password you set for root during the Proxmox GUI installation
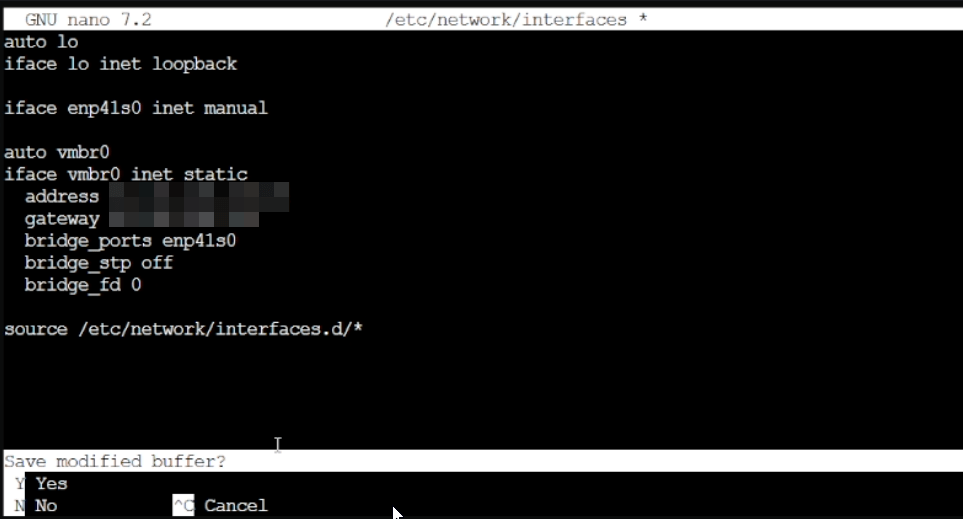
cat > /tmp/proxmox_network_config << EOF
auto lo
iface lo inet loopback
iface $INTERFACE_NAME inet manual
auto vmbr0
iface vmbr0 inet static
  address $IP_ADDRESS/$CIDR
  gateway $GATEWAY
  bridge_ports $INTERFACE_NAME
  bridge_stp off
  bridge_fd 0
EOF
# transfer the network configuration file to Proxmox VE system
sshpass -p "<ROOT_PASSWORD>" scp -o StrictHostKeyChecking=no -P 2222 /tmp/proxmox_network_config root@localhost:/etc/network/interfaces
# update the nameserver
sshpass -p "<ROOT_PASSWORD>" ssh -o StrictHostKeyChecking=no -p 2222 root@localhost "sed -i 's/nameserver.*/nameserver 1.1.1.1/' /etc/resolv.conf"
Now we can inform QEMU to gracefully shutdown the VM with the following commands
printf "system_powerdown\n" | nc 127.0.0.1 4444We are now ready to boot directly to Proxmox, restart the server so it exits the Rescue System and continue to the next section of this tutorial.
shutdown -r nowConfiguring Proxmox
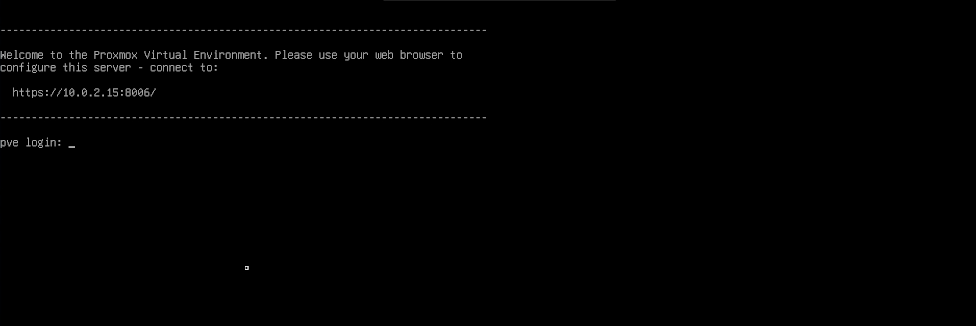
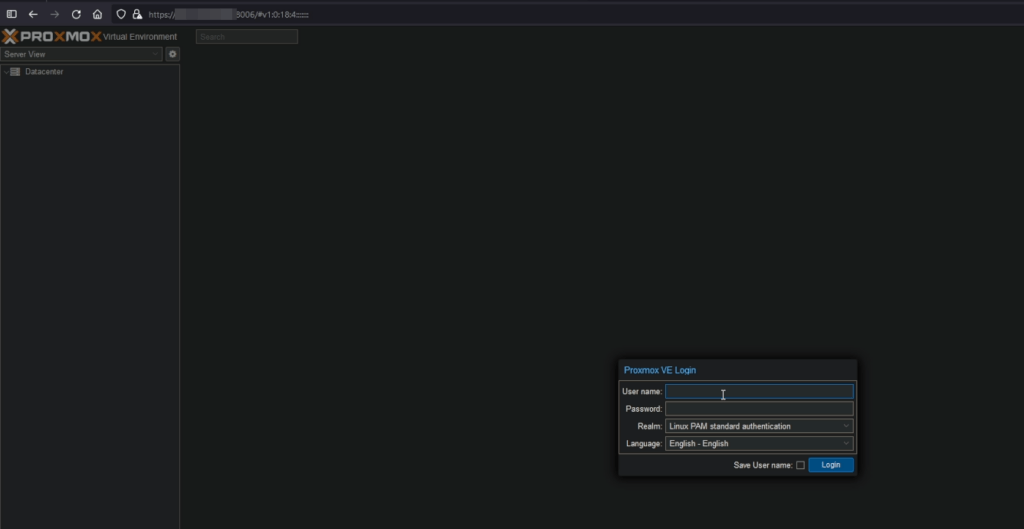
Now you should be able to access Proxmox from your browser using your https://<SERVER_IP>:8006
Running the community Proxmox VE Post Install script
From the web UI select your host on the left and click “Shell” at the top right.
From the shell window run the following command
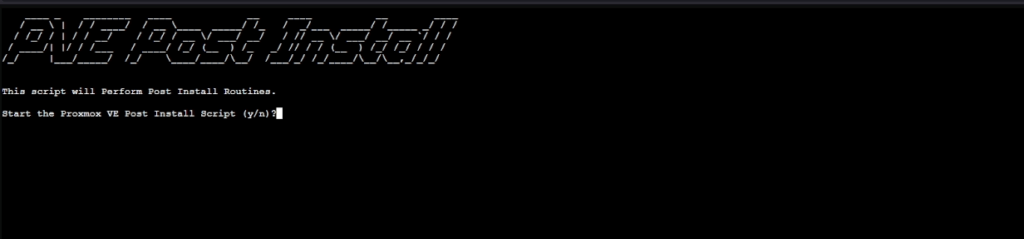
bash -c "$(wget -qLO - https://github.com/tteck/Proxmox/raw/main/misc/post-pve-install.sh)"This is the Post Install script made by tteck
It is used to tweak proxmox including removing the subscription nag, configuring community repo’s etc.
At the prompt type “y” to start the script
Say “yes” to correcting Proxmox VE sources
Say “yes” to disabling the “pve-enterprise” repository (unless you have a license)
Say “yes” to enabling the “pve-no-subscription” repository (unless you have a license)
Say “yes” to correcting the ‘ceph package sources (unless you have a license)
Say “yes” or “no” to adding the “pvetest” repository (user decision)
Say “yes” to disabling the subscription nag (unless you have a license)
Say “no” to disabling high availability unless you don’t require it
Say “yes” to updating Proxmox
Say “yes” to rebooting Proxmox (not always needed, but you may aswell)
Preparing for SDN functionality
Now to make use of DHCP in the SDN section we need to install dnsmasq and disable the default dnsmasq server, to do this enter the following commands
apt update
apt -y install dnsmasq
# disable default instance
systemctl disable --now dnsmasq
Now we need to make sure our /etc/network/interfaces file contains the following line at the bottom
source /etc/network/interfaces.d/*type the following command to check
cat /etc/network/interfacesIf you see source /etc/network/interfaces.d/* you can skip the following command, otherwise enter this command to add it to the interfaces file
printf "\n\nsource /etc/network/interfaces.d/*" >> /etc/network/interfacesCreating the SDN (Virtual Network)
Now back in the UI navigate to Datacenter > SDN > Zones
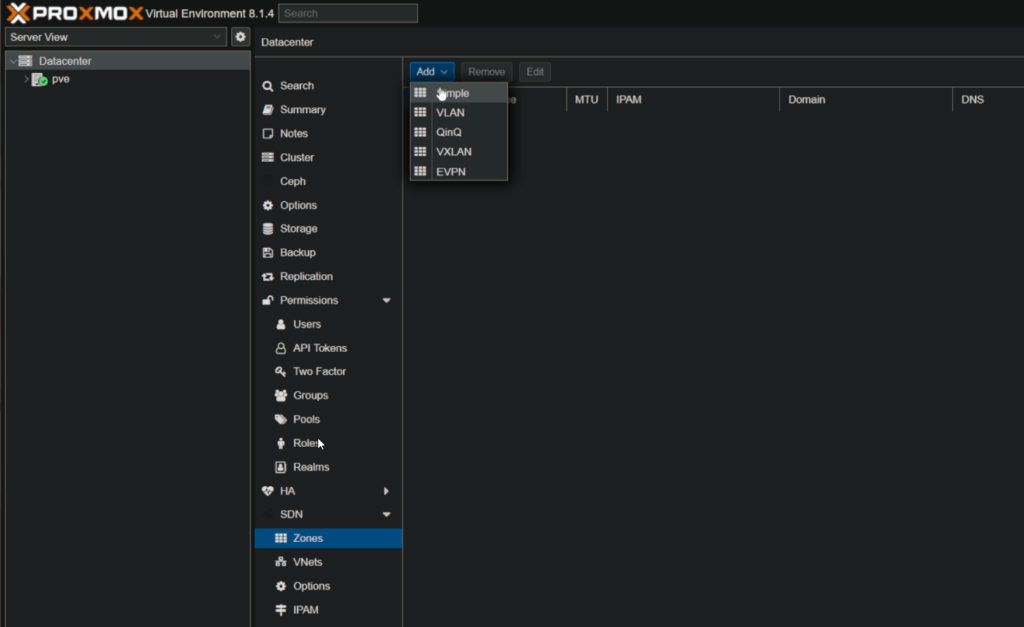
Create a simple zone and give it a name (we named ours ‘demo’) (it has to be lowercase and can’t be very long)
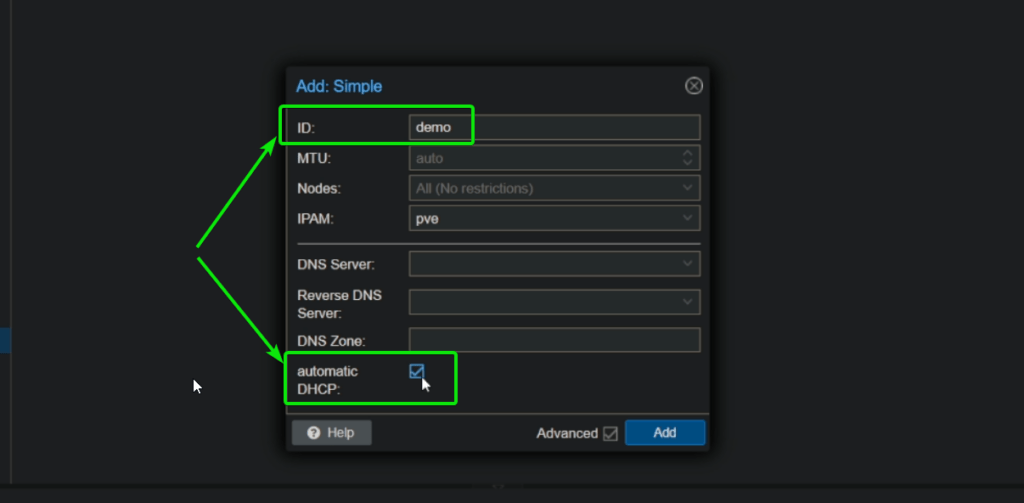
Make sure to tick the Advanced checkbox and then check automatic DHCP
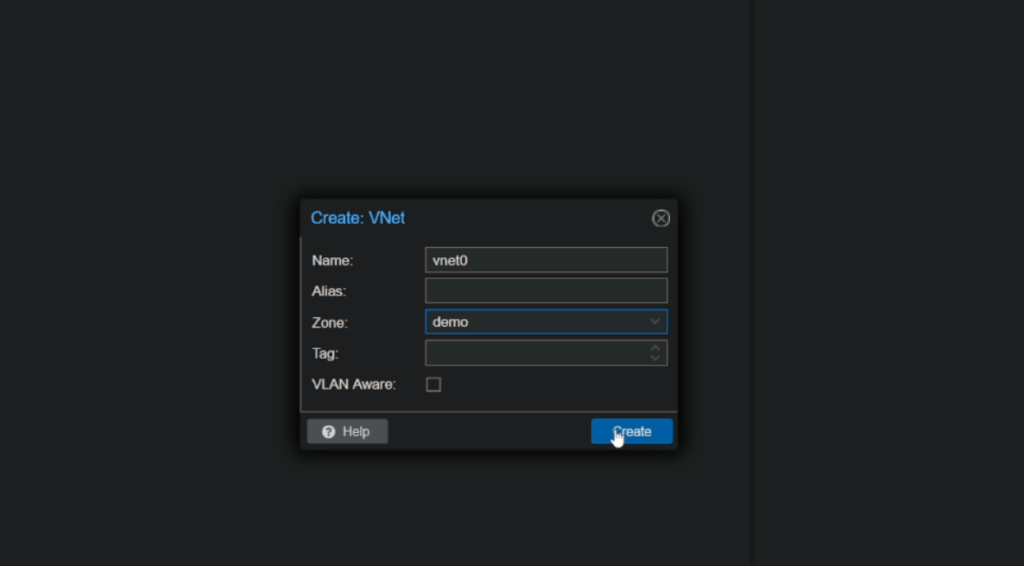
Next navigate to SDN > VNets and create a new VNet, name it whatever you like, we named ours vnet0, make sure to select the zone you created in the previous step from the Zone dropdown.
Next click the newly created VNet and on the right hand side create a new Subnet
Enter your desired Subnet, Gateway and DHCP Range, Make sure to also check the SNAT option to allow for the VM’s to have internet connectivity via SNAT.
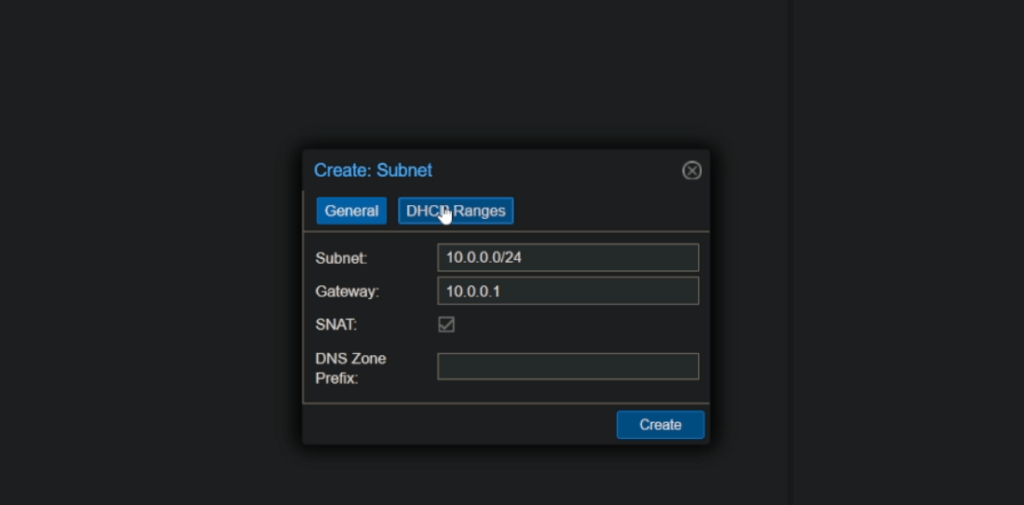
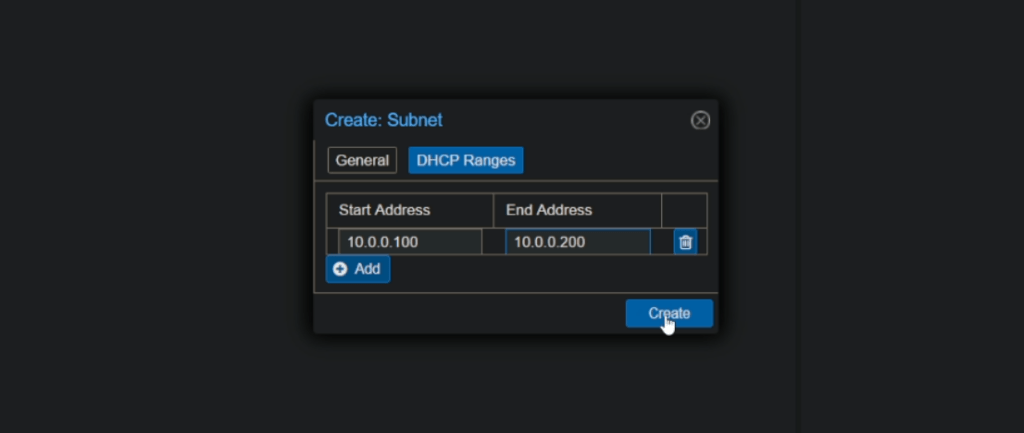
For our example we used 10.0.0.0/24 as the subnet, 10.0.0.1 as the gateway and a DHCP range of 10.0.0.100 to 10.0.0.200
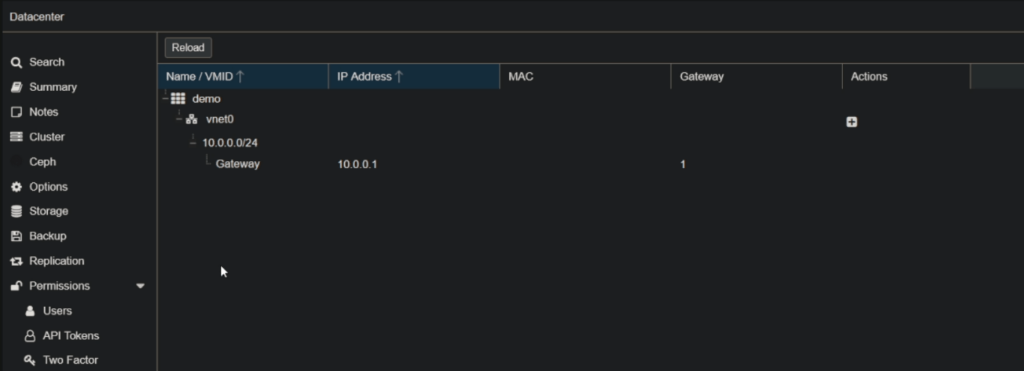
Now to activate this newly created SDN we must go back to the SDN section and click Apply.
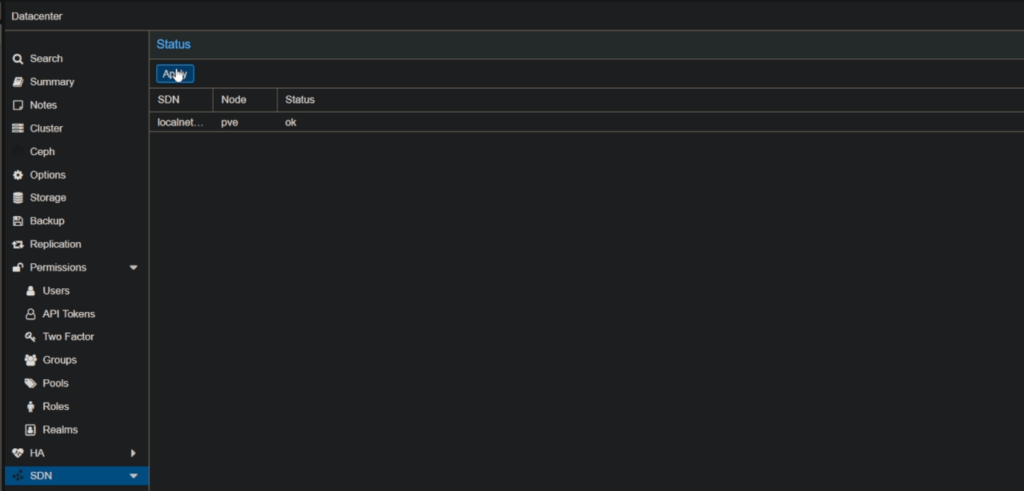
Once you click Apply you should see some information in the IPAM section, this is where you can manage DHCP reservations etc.
Congratulations your SDN is now created however we need to configure the firewall to allow the DHCP and DNS requests from the new VNet
Configuring the PVE Firewall
DO NOT TURN ON THE FIREWALL UNTIL YOU HAVE MADE THE SSH AND/OR HTTPS (PORT 8006) RULES, YOU WILL LOCK YOUR SELF OUT AND NEED KVM ACCESS OR HAVE TO START ALL OVER
As mentioned previously if you enable the firewall the VM/CT’s will be unable to contact the DHCP server for a DHCP lease, to resolve this we add the following firewall rules.
You can either do this at the host or datacenter level. depending on your choice select the Firewall option under Datacenter > Firewall or Hostname > Firewall
However before we add the rules for DNS and DHCP, we need to make sure that we don’t lose access to the SSH or Web interfaces since we are working remote. enabling the Firewall will lock us out.
So lets add a rule for SSH and 8006, for now we will keep it to all IP’s but you should consider locking this down to specific IP’s in the future (this can be done from the IPSet section of the UI and then setting the IPSet as the Source).
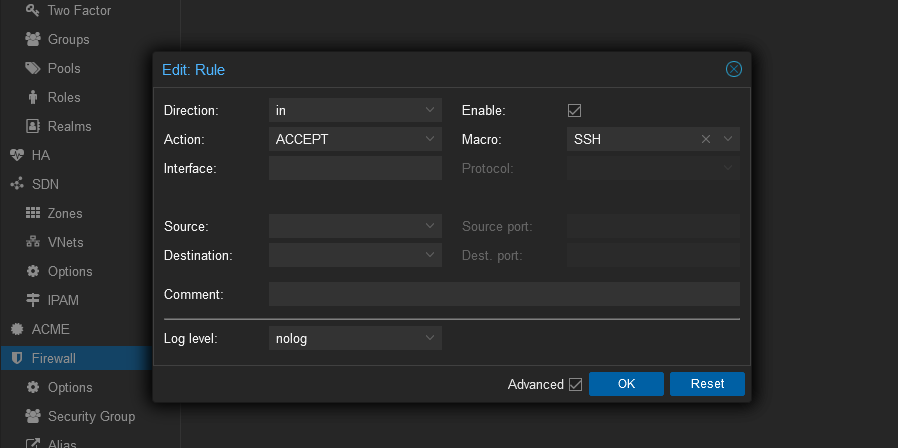
To enable SSH Access add the following rule,
Direction: IN, Action: ACCEPT, Macro: SSH and make sure the enable checkbox is checked.
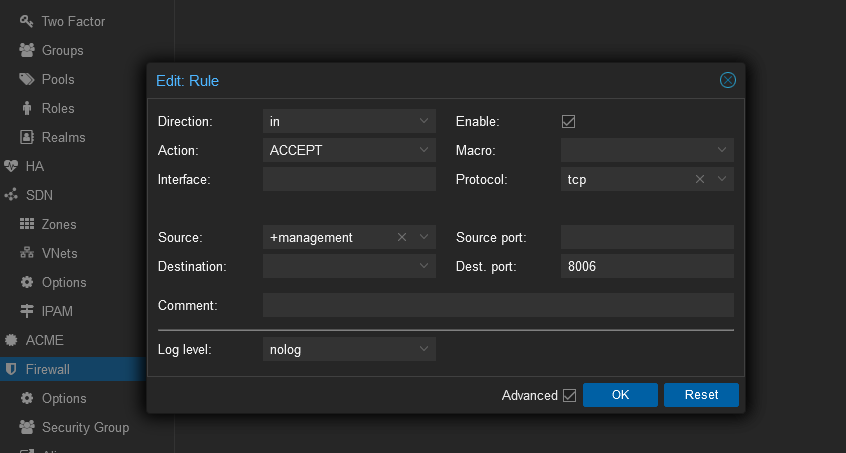
To enable Web UI access add the following rule,
Direction: IN, Action: ACCEPT, Protocol: TCP, Dest. port: 8006 and make sure the enable checkbox is checked.
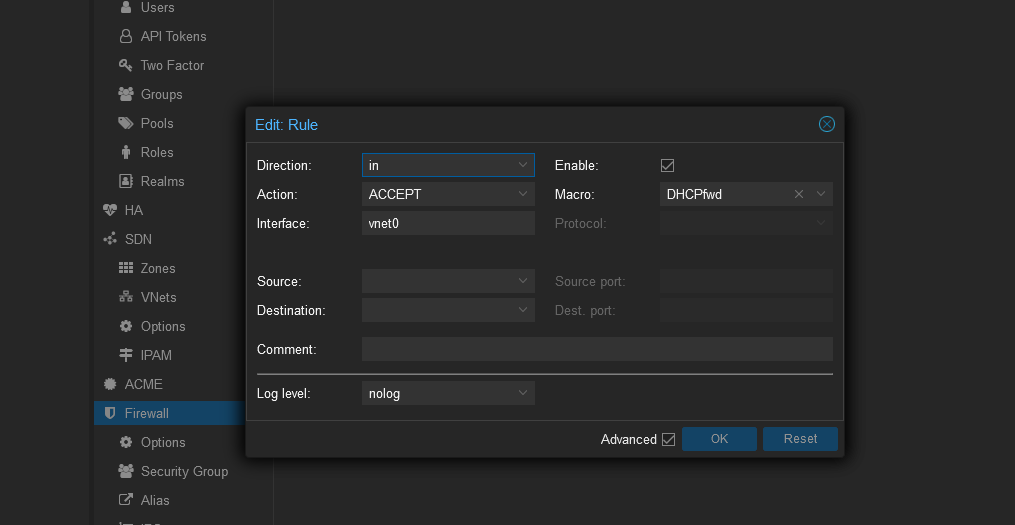
To enable DHCP add the following rule,
Direction: IN, Action: ACCEPT, Interface <vnet0> (enter the interface name you set earlier), Macro: DHCPfwd and make sure the enable checkbox is checked.
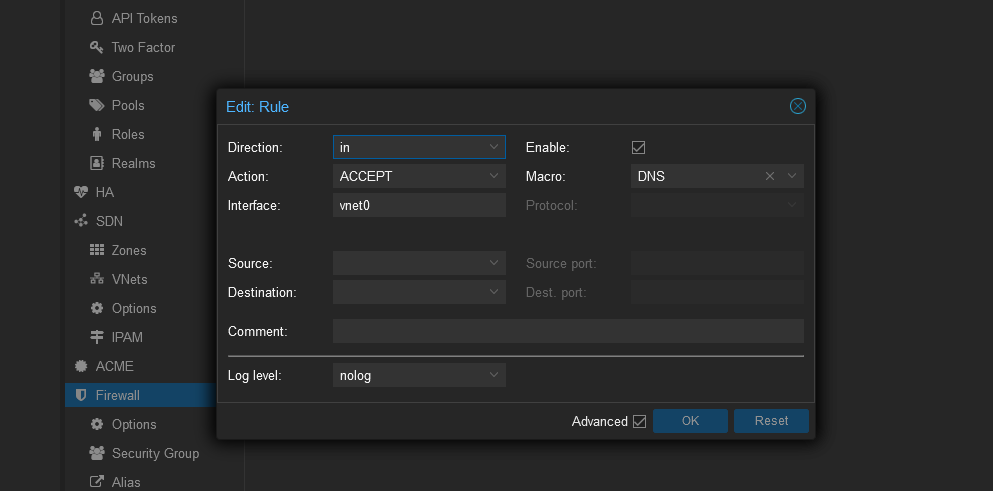
To enable DNS add the following rule,
Direction: IN, Action: ACCEPT, Interface <vnet0> (enter the interface name you set earlier), Macro: DNS and make sure the enable checkbox is checked.
Once these rules are added you can enable the Firewall, if you lose connection something has gone wrong and you will need to get KVM access from Hetzner and type pve-firewall stop in to the terminal
Testing the connectivity
Now we can create a CT to test the network connectivity.
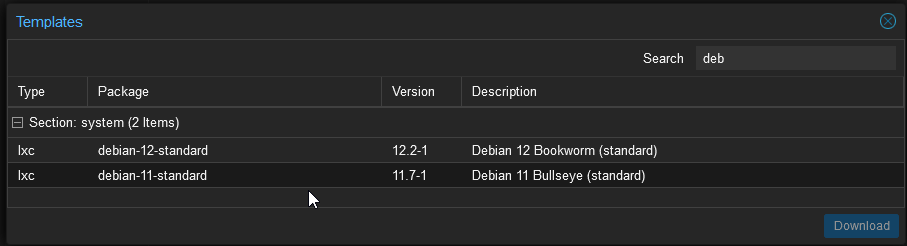
From the UI navigate to the “local” storage on the left and select CT Templates and then press the Templates button, download a test template such as Debian 11 or 12
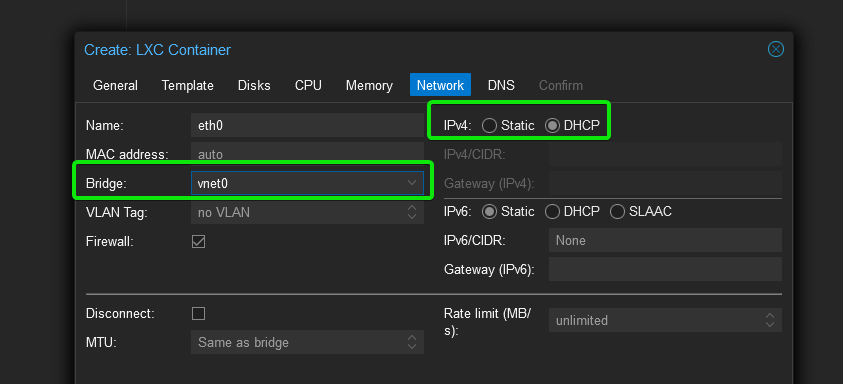
Once the template has downloaded create a new CT from the blue button at the top right.
Configure it how you wish but make sure for network you select the VNet you created earlier as the bridge and set IPv4 to DHCP not Static for us this was vnet0.
Start the CT, if all has gone to plan you should get a DHCP lease and be able to access the internet
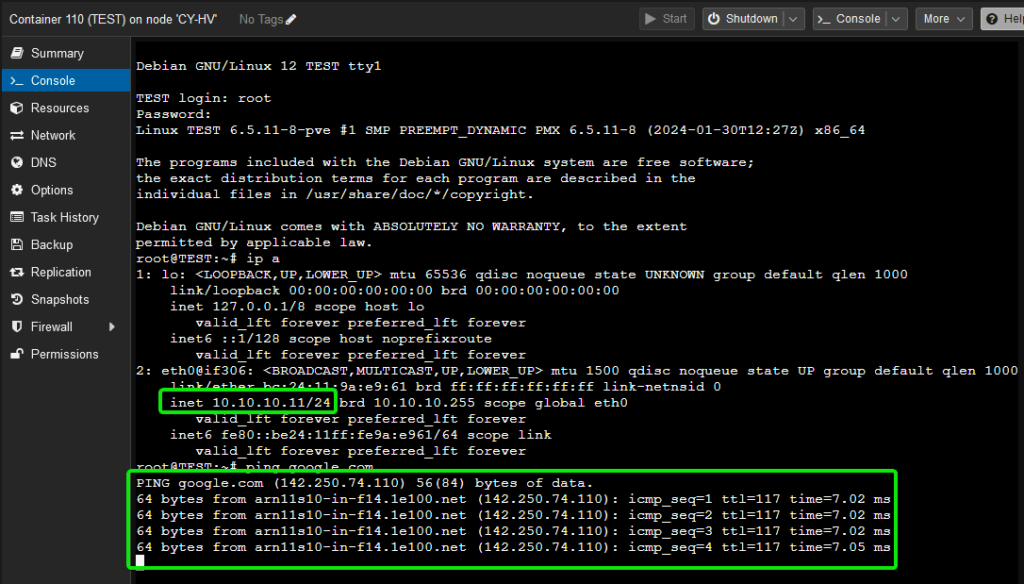
You should also be able to see it in SDN > IPAM

Port forwarding
Depending on your use case you may need to make some of the ports on your VM’s publically accessible, such as HTTP (80) and HTTPS (443), unfortunately there is no GUI way to do this so we need to drop down to a shell once more.
Enter the Proxmox shell from the top right of the UI or via SSH
Enter the following command replacing <ServerIP> with your Server’s public IP, <SPort> with your Source Port, <DPort> with your Destination Port (usually the same as SPort) and <VMIP> with the IP of your VM/CT that you wish to port forward to.
iptables -t nat -A PREROUTING -p tcp -d <ServerIP> --dport <SPort> -i vmbr0 -j DNAT --to-destination <VMIP>:<DPort>For Example, to forward 443 and 80 to a VM with the IP 10.0.0.10 i would do the following
iptables -t nat -A PREROUTING -p tcp -d 123.123.123.123 --dport 443 -i vmbr0 -j DNAT --to-destination 10.0.0.10:443
iptables -t nat -A PREROUTING -p tcp -d 123.123.123.123 --dport 80 -i vmbr0 -j DNAT --to-destination 10.0.0.10:80
Once this is done you should be able to access your port from the public IP, for my example i am running Nginx on port 80 so if i visit http://123.123.123.123:80 i can see the “Welcome” page.
Persisting the port forward
The previous step added iptable rules to enable port forwarding, however these will not survive a reboot. there are many ways to make sure these rules persist a reboot, the method we will use is adding these commands to the post-up of the network interface.
You can edit the SDN interfaces file using nano, we will be editing the file to add a post-up command.
nano /etc/network/interfaces.d/sdnYou will see there are already post-up commands, we will simply add another 1 (or many if you have multiple ports to forward), simple use the same command you entered in the previous section but prepend post-up, so for example i would enter the following
post-up iptables -t nat -A PREROUTING -p tcp -d 123.123.123.123 --dport 443 -i vmbr0 -j DNAT --to-destination 10.0.0.10:443
post-up iptables -t nat -A PREROUTING -p tcp -d 123.123.123.123 --dport 80 -i vmbr0 -j DNAT --to-destination 10.0.0.10:80
My file would then look like this
auto vnet0
iface vnet0
        address 10.0.0.1/24
        post-up iptables -t nat -A POSTROUTING -s '10.0.0.10/24' -o vmbr0 -j SNAT --to-source 123.123.123.123
        post-down iptables -t nat -D POSTROUTING -s '10.0.0.10/24' -o vmbr0 -j SNAT --to-source 123.123.123.123
        post-up iptables -t raw -I PREROUTING -i fwbr+ -j CT --zone 1
        post-down iptables -t raw -D PREROUTING -i fwbr+ -j CT --zone 1
        post-up iptables -t nat -A PREROUTING -p tcp -d 123.123.123.123 --dport 443 -i vmbr0 -j DNAT --to-destination 10.0.0.10:443
        post-up iptables -t nat -A PREROUTING -p tcp -d 123.123.123.123 --dport 80 -i vmbr0 -j DNAT --to-destination 10.0.0.10:80
        bridge_ports none
        bridge_stp off
        bridge_fd 0
        ip-forward on
Press CTRL + X, then Y and press enter to save and exit the file.
(technically you should add a post-down rule with the same command but with -D instead of -A but this isn’t super important)
Congratulations you have completed the guide and now have Proxmox fully up and running with a single IP, with full DHCP, Internet connectivity and port forwarding all without having to request console access to Hetzner.
Credits
This guide was written by CyanLabs but a large amount of information was found around the web, we simply combined it all.
All credits for the QEMU steps go to gushmazuko on github.
Thanks to the Proxmox team for helping with a troubleshooting issue we were having.
If this guide has helped you please consider donating to inspire us to write more guides!
