Introduction
Since the introduction of Fast Startup in Windows 10 WOL from a complete power off has been awkward and complicated to implement. Although as far as i know it’s still not possible to do this with Fast Startup enabled this guide will walk you through disabling fast startup and configuring the required UEFI settings.
Goals
- To be able to turn your computer on from your LAN (or remotely if you port forward etc) on Windows 10
Please note for this guide i will be using my own PC which is running a ASUS X299 motherboard, similar options should apply to other brands and they should be pretty identical between other ASUS motherboards. My Motherboard also has 2 network ports so for the purpose of this guide i have set WOL only on the second of the 2.
Windows settings
The first thing you need to do is disable Fast Startup, if this option doesn’t exist it’s likely already off, it will be off if you have previously disabled hibernate with powercfg /h off.
- Press Windows + R and type powercfg.cpl and then press enter.
- Select Choose what the power buttons do and then under Shutdown Settings.
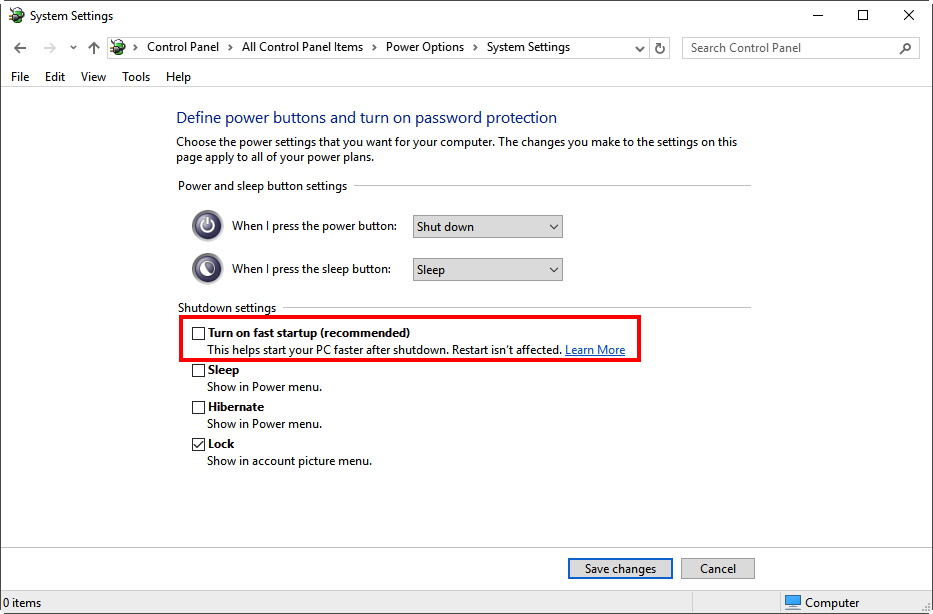
- If these options are greyed out click Change settings that are current unavailable and the options will no longer be greyed out.
- Now simply uncheck Turn on fast startup and press Save Changes.
Now that we have disabled Fast Startup will need to make sure the network adapter is setup correctly.
- Press Windows + R and type ncpa.cpl and then press enter.
- Right click the network adaptor you wish to set WOL up on and press Properties and then Configure
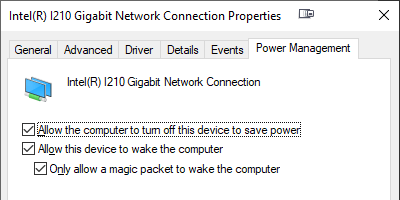
- Next click the Power Management tab and make sure it’s as shown below.
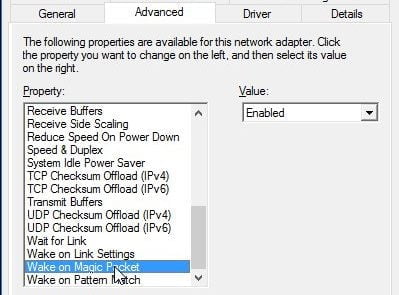
- Depending on your network adaptor you may also need to go in to the Advanced tab and enable something like Wake on Magic Packet or Wake on Shutdown or Enable PME as shown below.
- This should be all that is needed from the Windows side of things. we now need to access your UEFI to configured the low level settings.
UEFI settings
Now that we have Windows configured correctly we need to configure a couple of things in the UEFI.
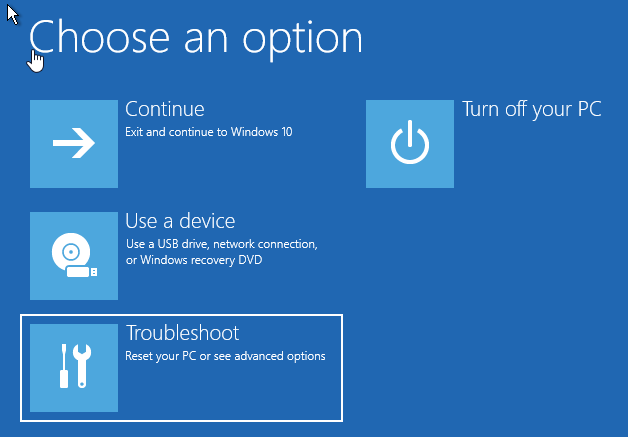
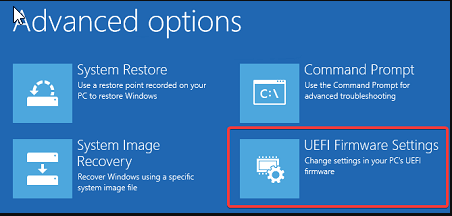
- The easiest way to get in to the UEFI on Windows 10 is to hold the Shift Key while pressing Restart and once you are at a menu select Troubleshoot and then UEFI Firmware Settings once you click this you will be rebooted in to the UEFI.
- Once you are in the UEFI the process will vary depending on your Manufacturer. As mentioned previously this guide will mostly focus on ASUS but similar options usually exist on Gigabyte, MSI, EVGA etc.
- Press “F7” to enter Advanced Mode, Once in Advanced mode navigate to the following sections
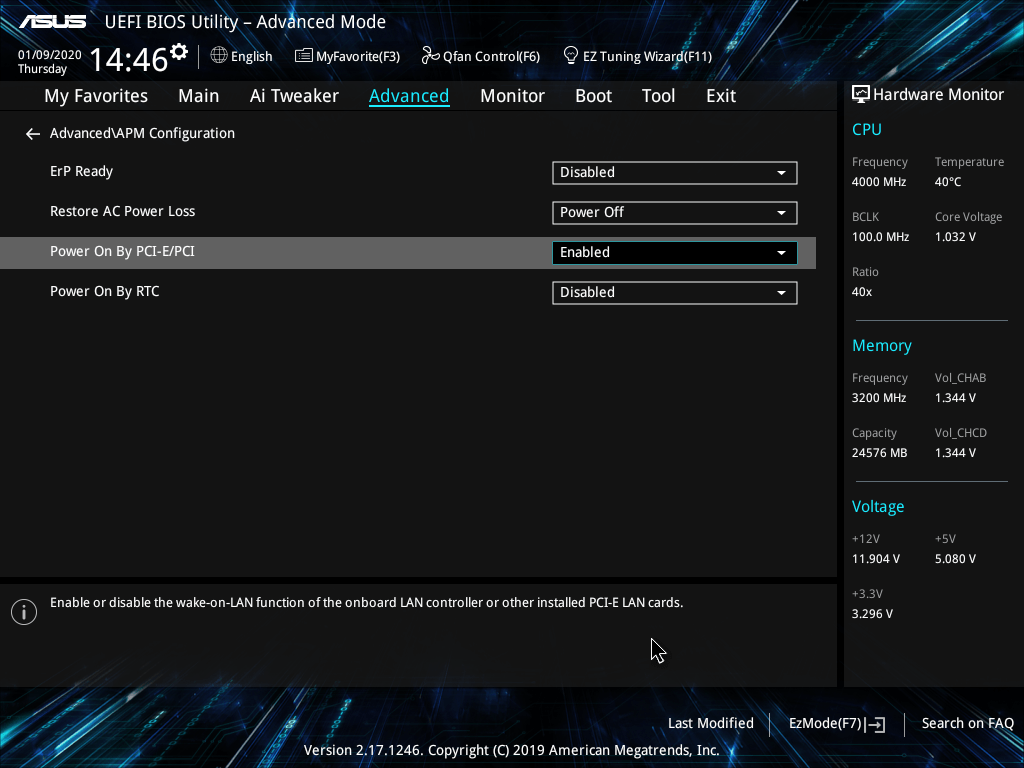
- Advanced > APM Configuration and make sure that ErP Ready is disabled and Power On By PCI-E/PCI is enabled.
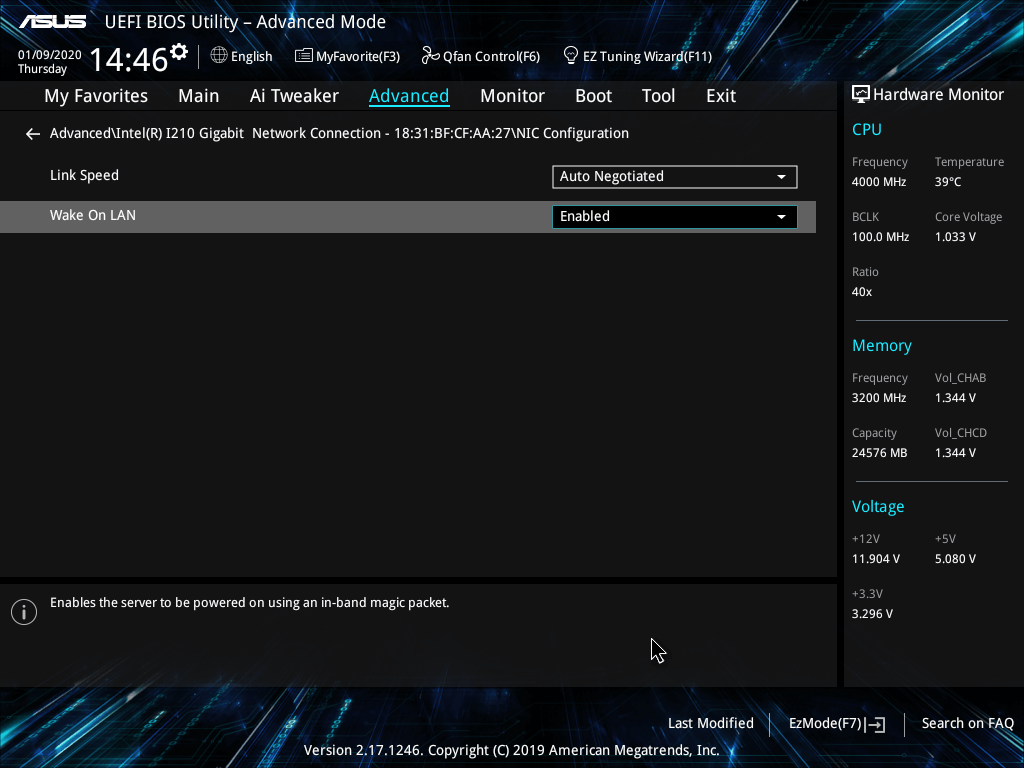
- Select Advanced and Scroll right to the bottom and you should see your LAN adaptor, in my case this was Intel I210 Gigabit Network Connection – MAC, Select your adaptor and then select “NIC Configuration” and make sure that Wake On LAN is set to Enabled. If you don’t have this option you can skip this step.
- Advanced > APM Configuration and make sure that ErP Ready is disabled and Power On By PCI-E/PCI is enabled.
Testing
Now you should be ready to test. I use a android phone on the same network for testing, to do this i use the app Wake On LAN (https://play.google.com/store/apps/details?id=co.uk.mrwebb.wakeonlan&hl=en) there are similar for other platforms.
